After purchasing this theme please download the package from ThemeForest (to do this you must be logged in ThemeForest). Move your mouse over your ThemeForest login name in right top corner and then click Download. On the Downloads page you will find all the items that you have purchased. This theme will also be here.
In the next step click the Download All files & documentation button and save package on your computer.

Please unpack the entire package after downloading.
The Main Files includes the following folders:
- Demo Content – Contains demo content
- Documentation – Contains documentation
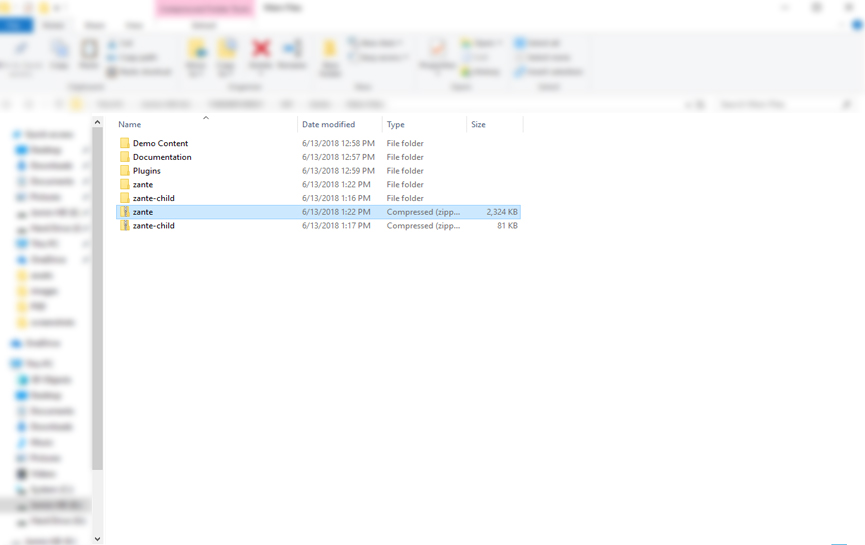
- zante – Contains theme
- zante-child – Contains child theme
- zante.zip – Contains theme (ZIP folder for installation)
- zante-child.zip – Contains child theme (ZIP folder for installation)
Recommended Hosting: Cloudways
Install via WordPress Theme Manager
Step 1. Login to your WordPress admin page.
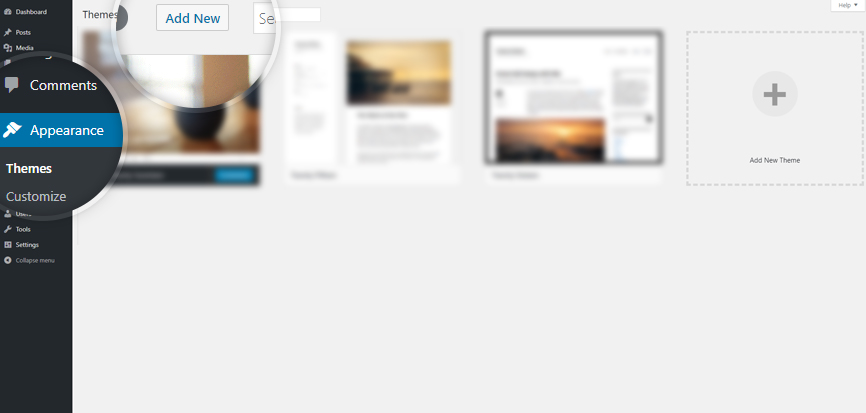
Step 2. Navigate to Appearance Themes.
Step 3. Press Add New button.
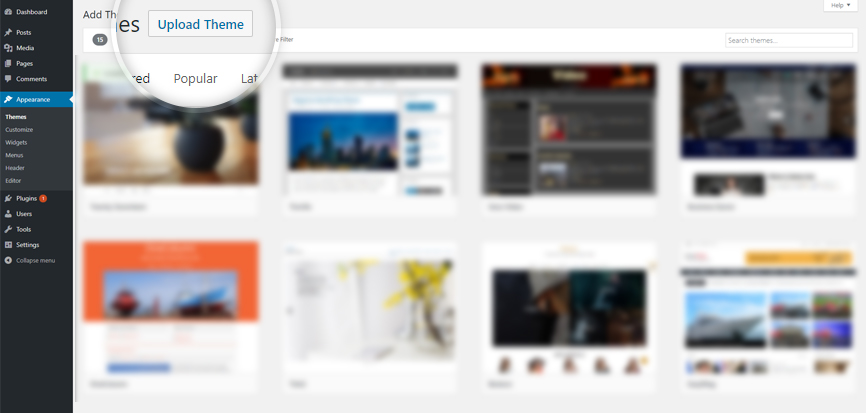
Step 4. Press Upload Theme button.
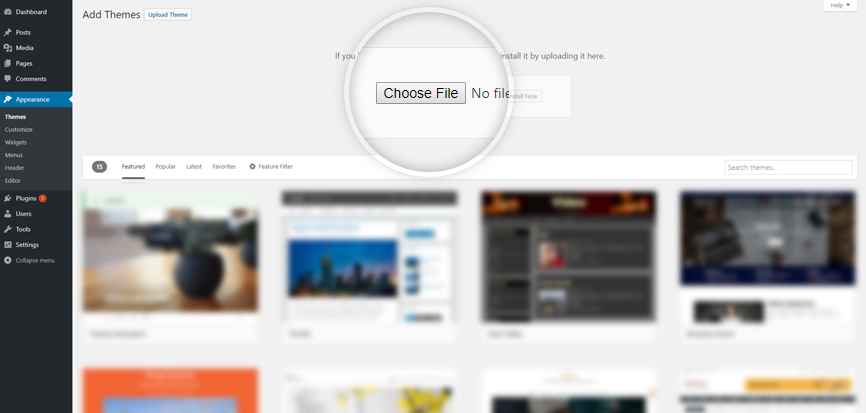
Step 5. Press Choose File button.
Step 6. Select the theme zip file zante.zip.
Step 7. Then press Install Now button.

The installation process starts…
Please Note: If at this step you see some error (for example: The uploaded file exceeds the upload_max_filesize directive in php.ini), go to Install via FTP section.
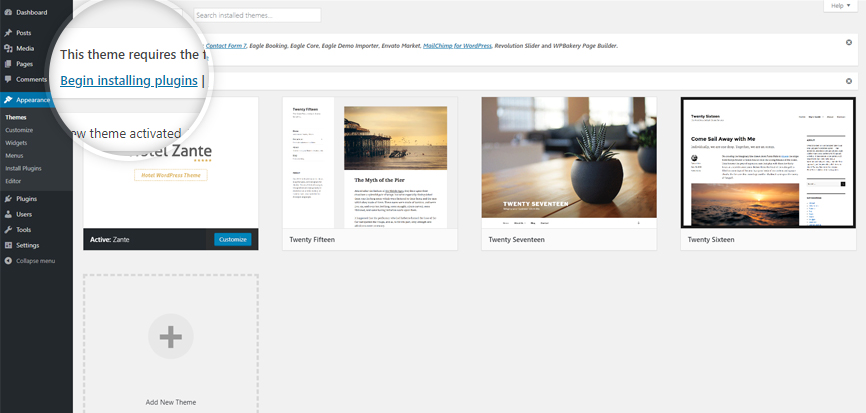
Step 8. After the installation is complete, click Activate the theme.

Please Note: If you intend to make changes on theme style or theme files (now or in the future) we strongly recommend you to install & activate also the Zante Child Theme (zante-child.zip).
Install Required Plugins
Step 1. The theme is now activated. You should now install and activate the required plugin by clicking on Begin installing plugins on top of the screen.
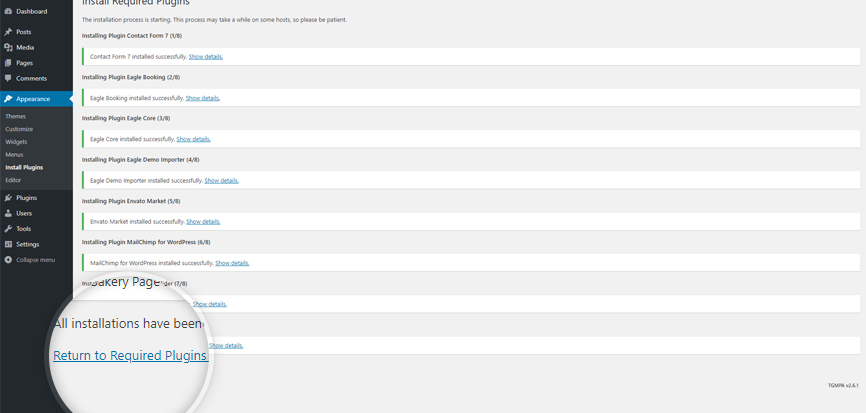
Step 2. Select Required plugins and then choose Install from the dropdown menu. Press Apply button to continue the installation.

Step 3. After the installation is complete, click on Return to Required Plugins Installer.
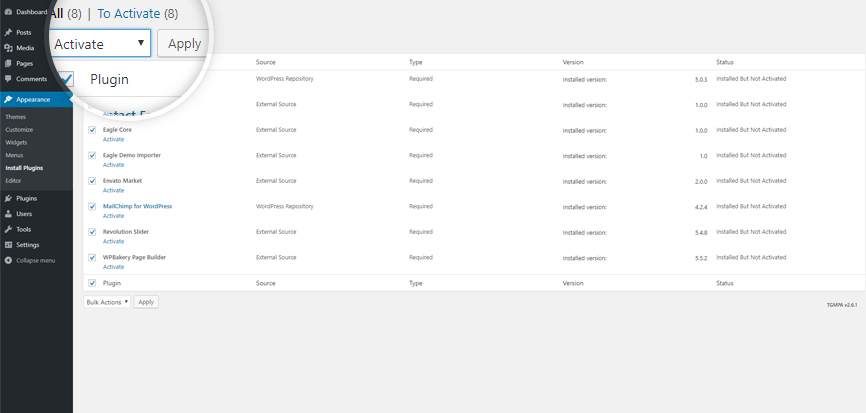
Step 4. Select Installed plugins and then choose Activate from the dropdown menu. Press Apply button to continue the activation.
Install via FTP
If you have any problems with installing the theme from the WordPress Dashboard (for example, you see this error: “The uploaded file exceeds the upload_max_filesize directive in php.ini” or “Are you sure you want to do this?”), then you need to install it via FTP.
For this you need to upload non-zipped theme folder called zante to /wp-content/themes/ folder in your WordPress installation folder on your server.
Next, login to your WordPress admin page and activate the theme (Appearance Themes).
After the successful activation see Step 9 of this documentation.
Installation Video
- FTP Clients – https://wordpress.org/support/article/ftp-clients/
- Adding New Themes – https://wordpress.org/support/article/using-themes/#adding-new-themes
- Activating the Theme – https://wordpress.org/support/article/using-themes/#activating-the-theme